
How to Setup a TP-Link Router
Updated 10/29/2025
How to setup a TP-Link Router
How to setup your TP-Link Router
In This guide I will go over and showcase how you are able to configure your TP Link router, this tutorial will go over setting up a custom wi-fi name and custom wi-fi password. This guide should be applicable to most TP-Link routers however for exact steps please consult your owners manual. Alternativly is you are renting a router from us please give us a call to change it for you as we disable the ability for users to change our settings.
Step 1:
The first step in setting up the new router will be to ensure the cables are connected properly and everything is powered on. The picture below represents what your setup should look like
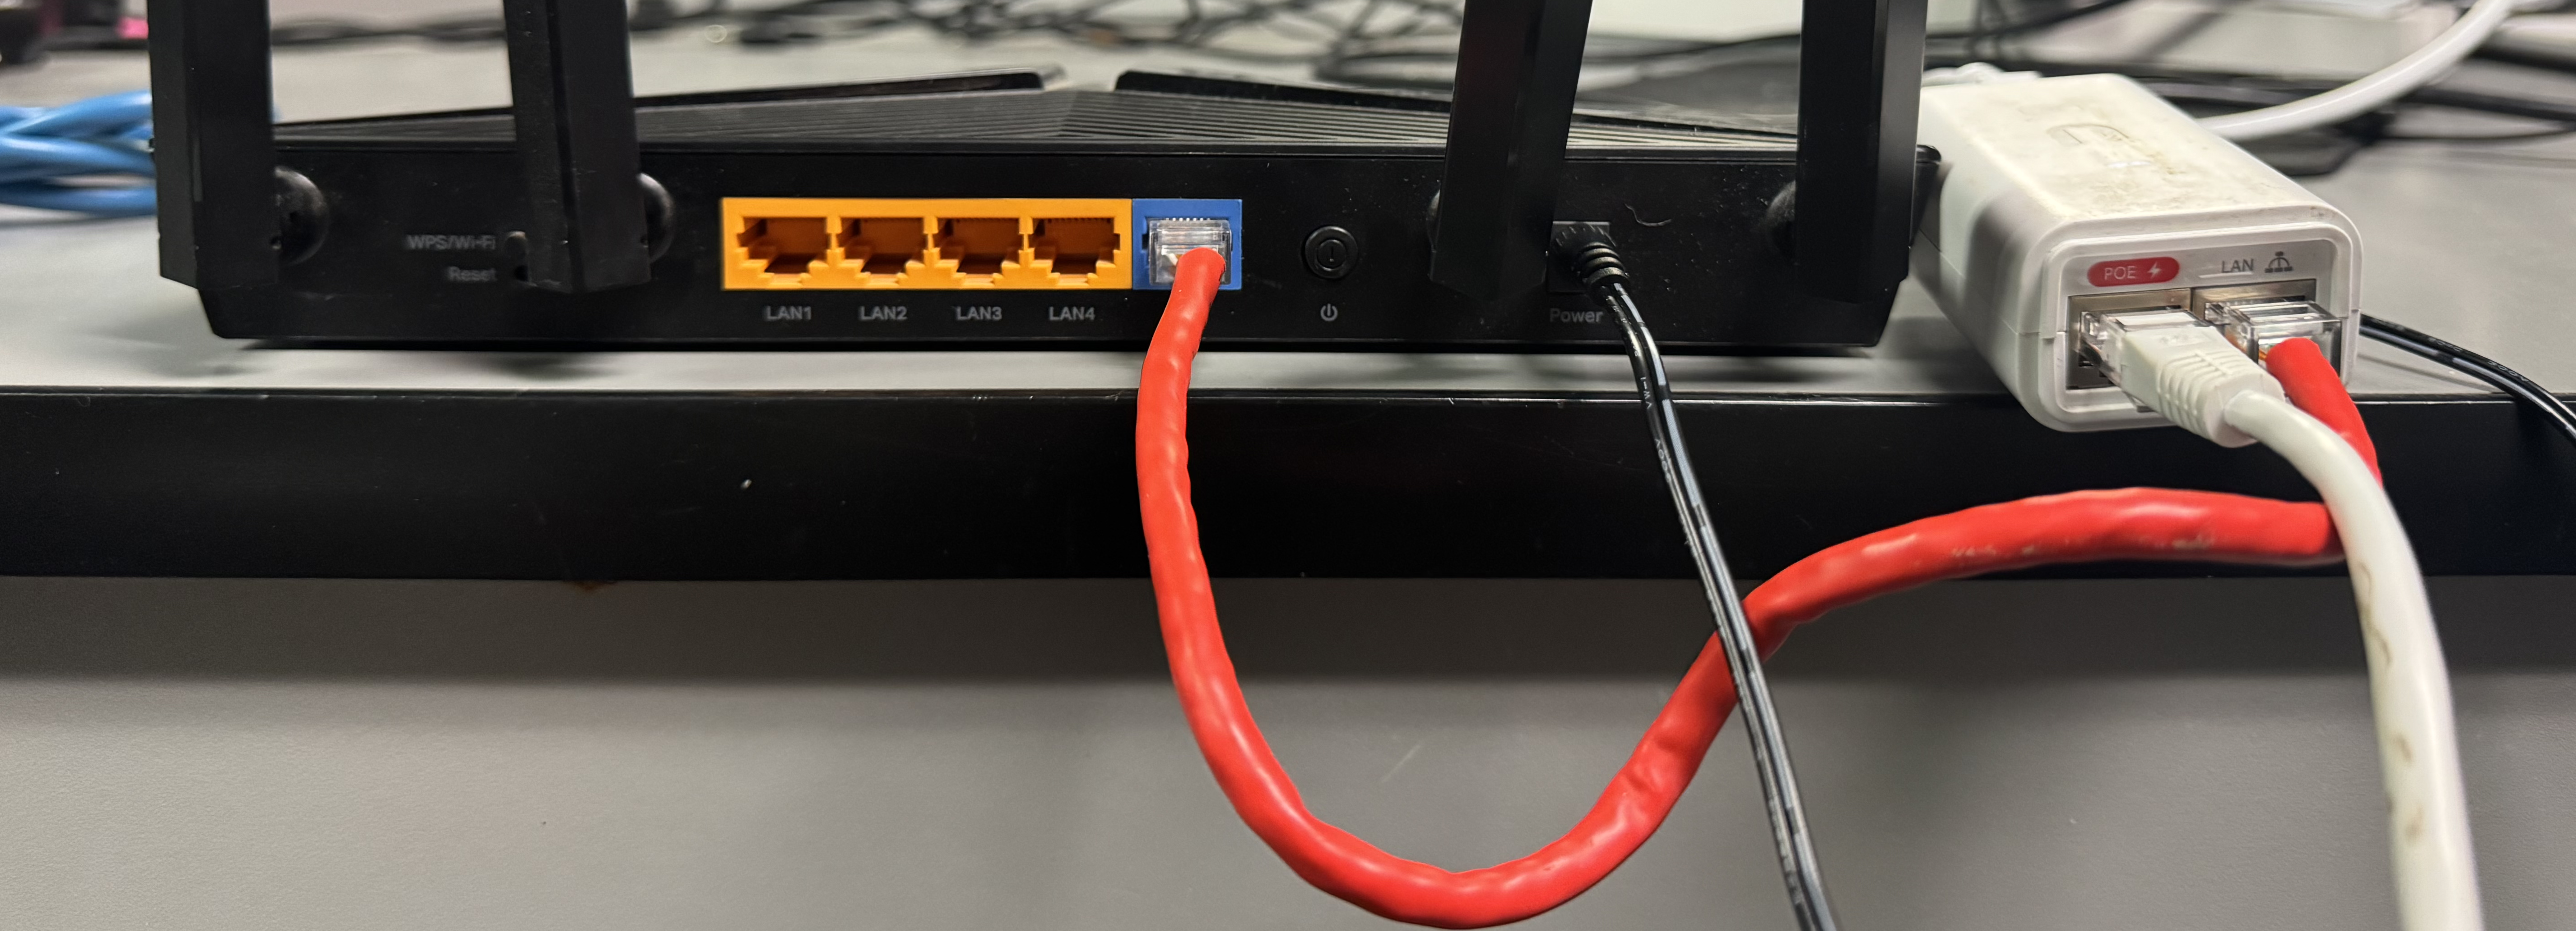
Take note of the Blue Port connected with the Red cable. It connects from the WAN port on the router into the LAN port on the white PoE adapter. In addition to this the power cable must be connected as well as the power button seen inbetween the blue WAN port and the power cable. In this model the white cable will be coming in from outside.
Step 2:
Now that you the router is connected to us, it’s time to connect you to the router. In the next steps you may either connect your device via an ethernet cable attached to the orange ports on the router, or join the wi-fi. To figure out the name of your wi-fi you will want to consult the sticker on the bottom of your router:
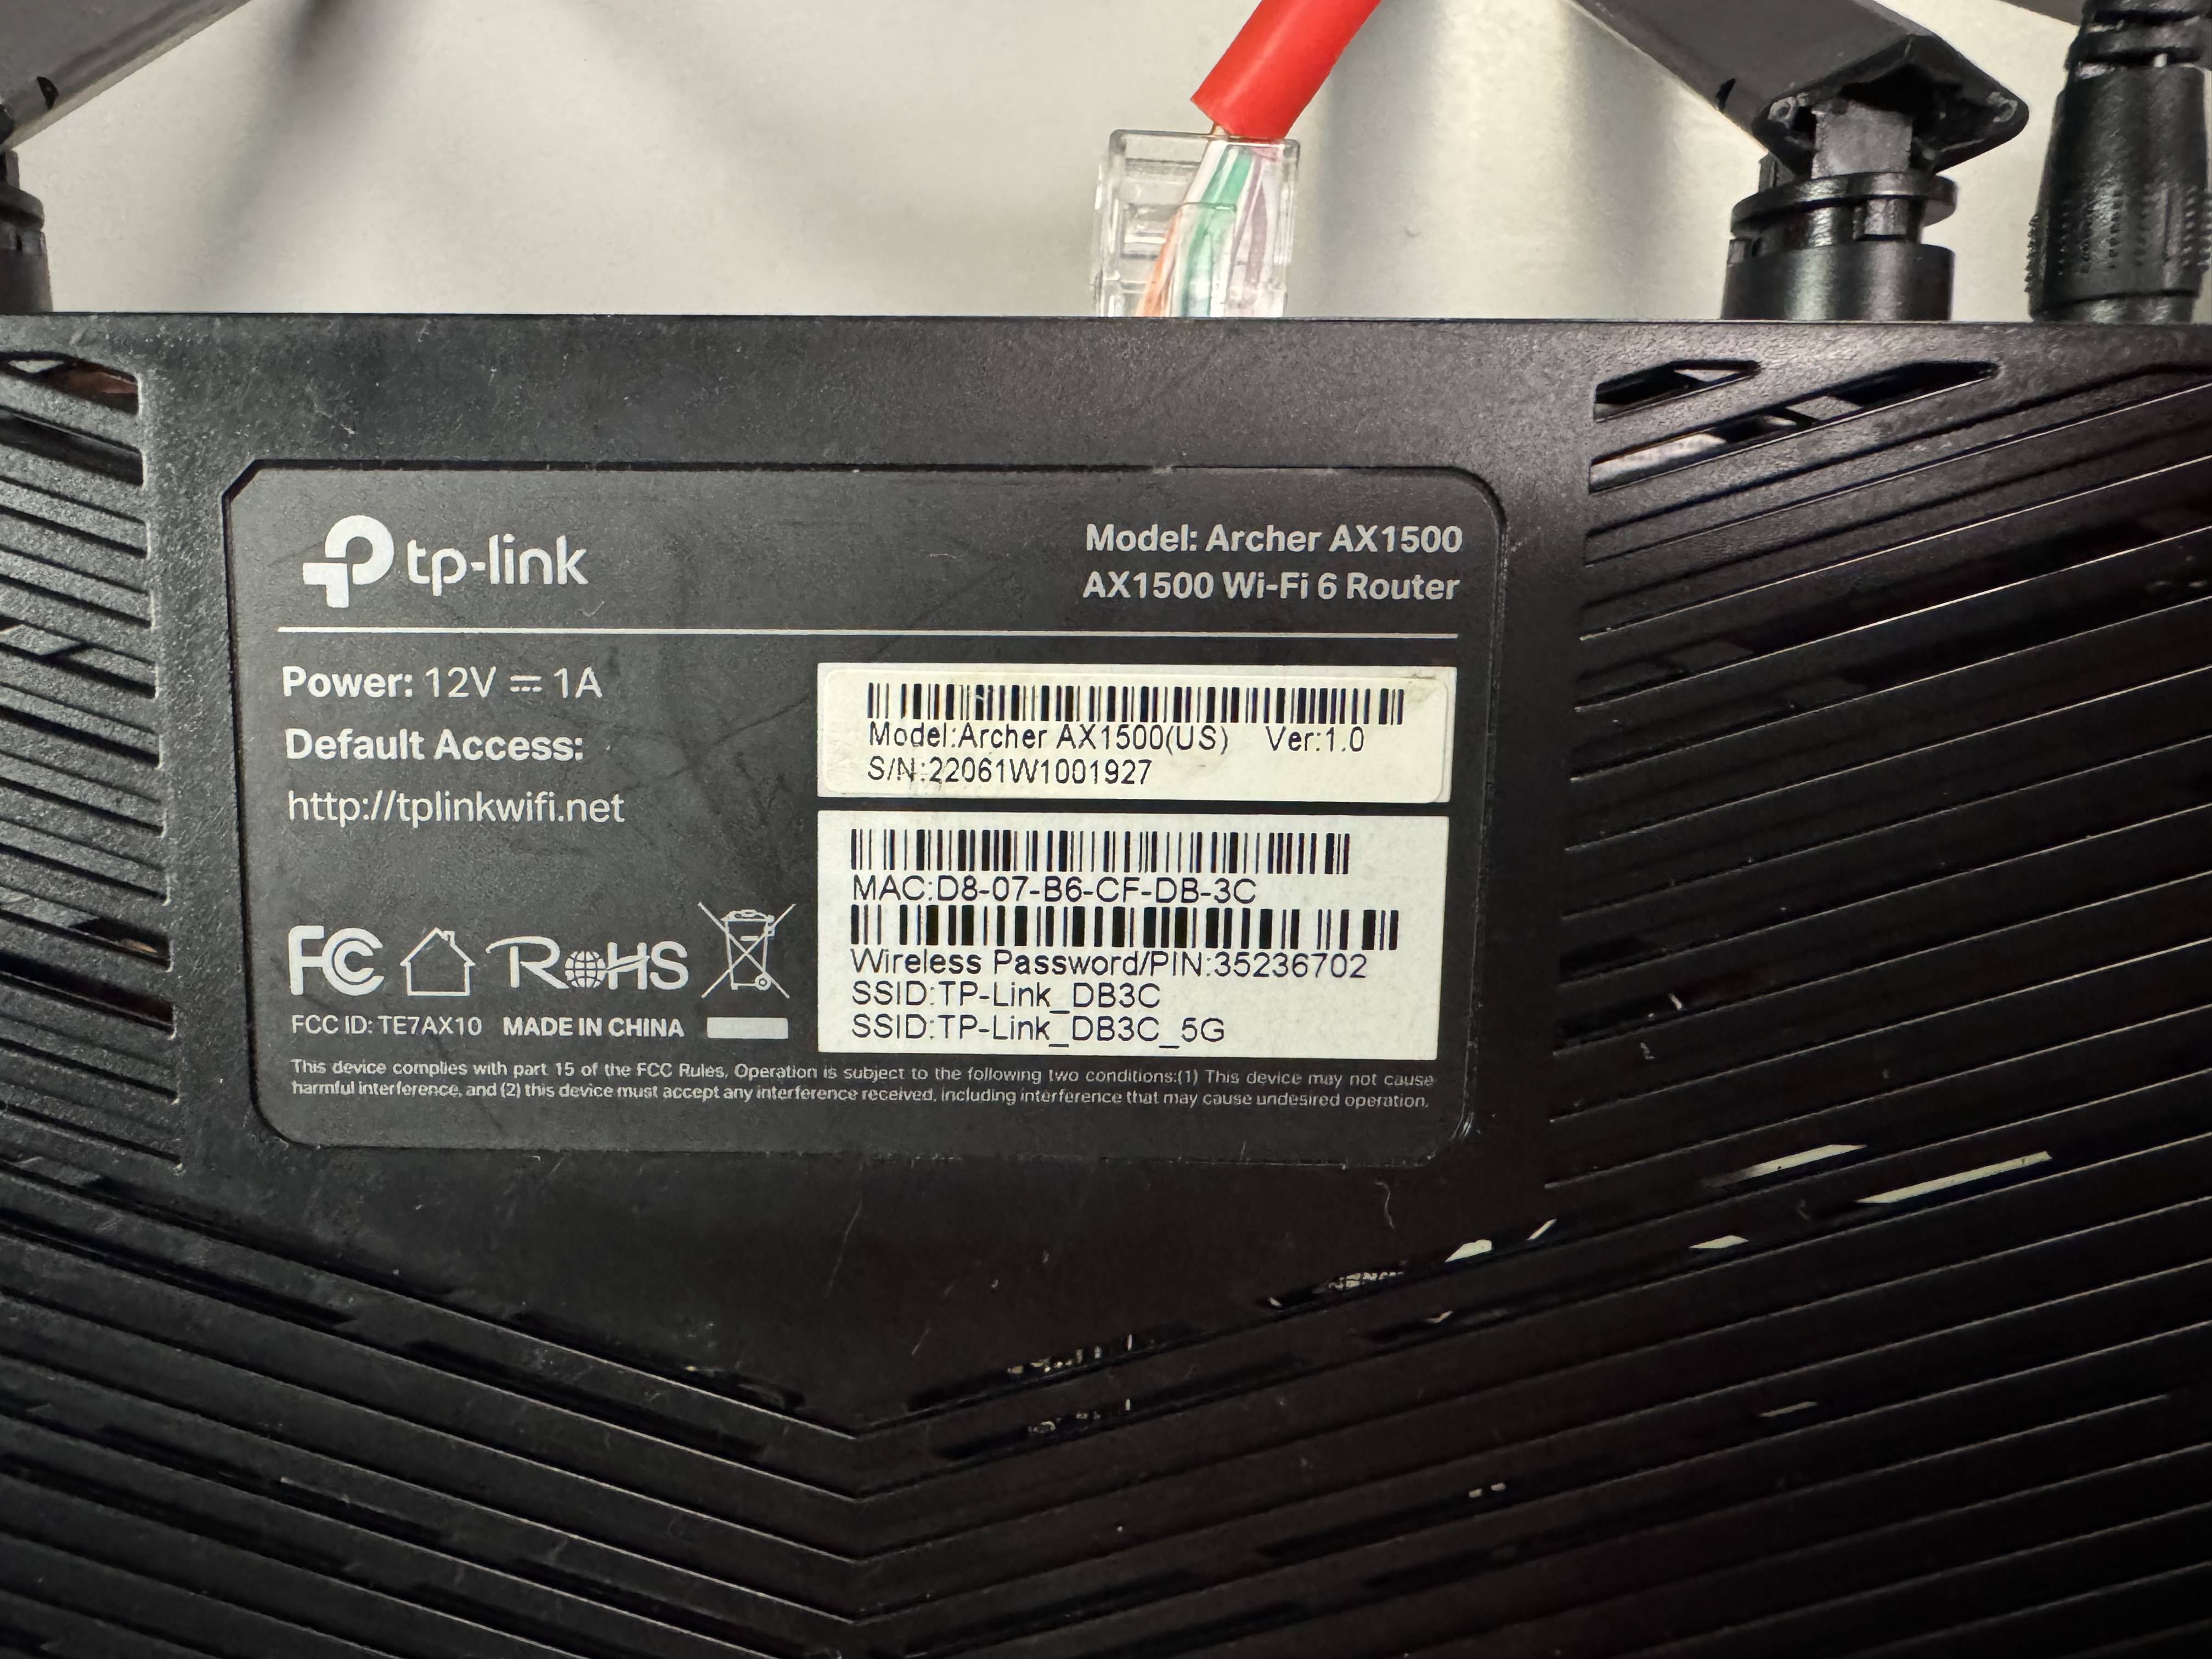
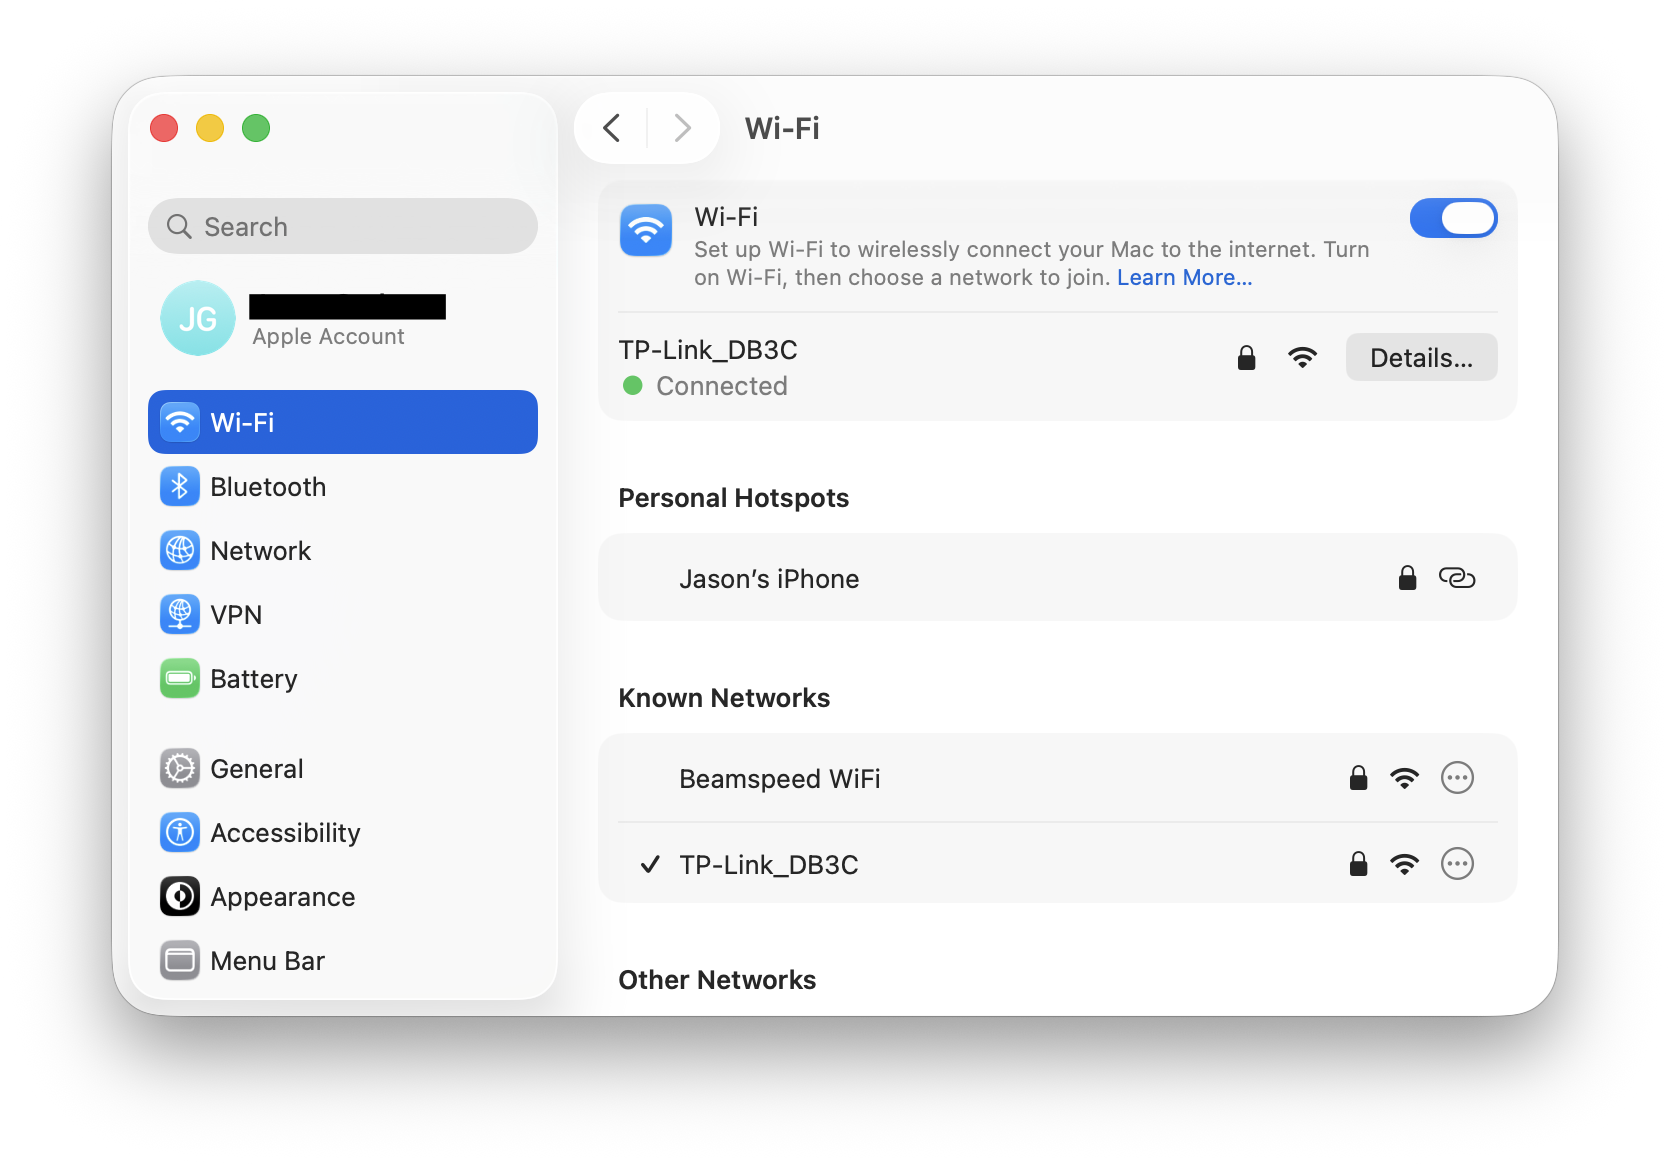
In This example, the name of the wi-fi network would be TP-Link_DB3C and the password would be 35236702 with this information you can go into the settings application of any device and join onto this network. This is what it will look like at least on MacOS when you join the wi-fi network
Congradulations! You are now connected to your new router and ready to begin the setup process, the first step will be to navigate to this exact website, this is the special website being hosted from your router for you to set it up. The website to go to exactly is
http://192.168.0.1
Take special note here of the http being used here, normally you would want https for security but for right now we want to insecurly access our router to set it up. When you go to that website you will see TP-Link branding in the top right, as well as it will begin to prompt you to create a new password. This is a special password that you will use to make changes to your router, such as changing the same of your network, making a guest network, or changing the wi-fi password of your network. Just keep in mind this is a Different password as compared to your wi-fi password, which you will setup later.

go ahead with making up a passsword, the page will refresh and you will be prompted for some basic questions like your timezone, that’s one of those things I can’t tell you the right answer for just put your timezone correctly, then press next.
Step 3: Setting up a custom wi-fi name and password

Now for the fun part, the next page will prompt you to create your network name and password. This is what will appear on your devices.
Keep in mind that malicious people will be able to easily guess within a matter of seconds a password that does not include at least a number or a special charater, including such charaters slows down hackers time to bruteforce your password by a significant margin.
Concluding 🙌
Congradulations, you have now setup your router, I would recommend at this point running some speed tests and check how your connection is doing. So long as all instructions were followed, you should be online and ready to start connecting the rest of your devices, for specific guides I have attached some commonly used devcies and a guide on how to connect them to wi-fi
Helpful articles:
How to connect your Roku to wi-fi
How to connect your iPad or iPhone to wi-fi